Dual Axis Solar Tracker DIY Arduino Powered YouTube
Arduino Solar Tracker- In this tutorial, you will learn how to make your own Arduino based solar tracking system. This solar tracker project is based on Arduino, LDR, and H-bridges. The LDR's will be used for sunlight sensing. In this tutorial, I will discuss everything Arduino Solar Tracker Complete circuit diagram Step by Step soldering

Dual Axis Solar Tracker V2 Solar tracker, Arduino projects, Simple arduino projects
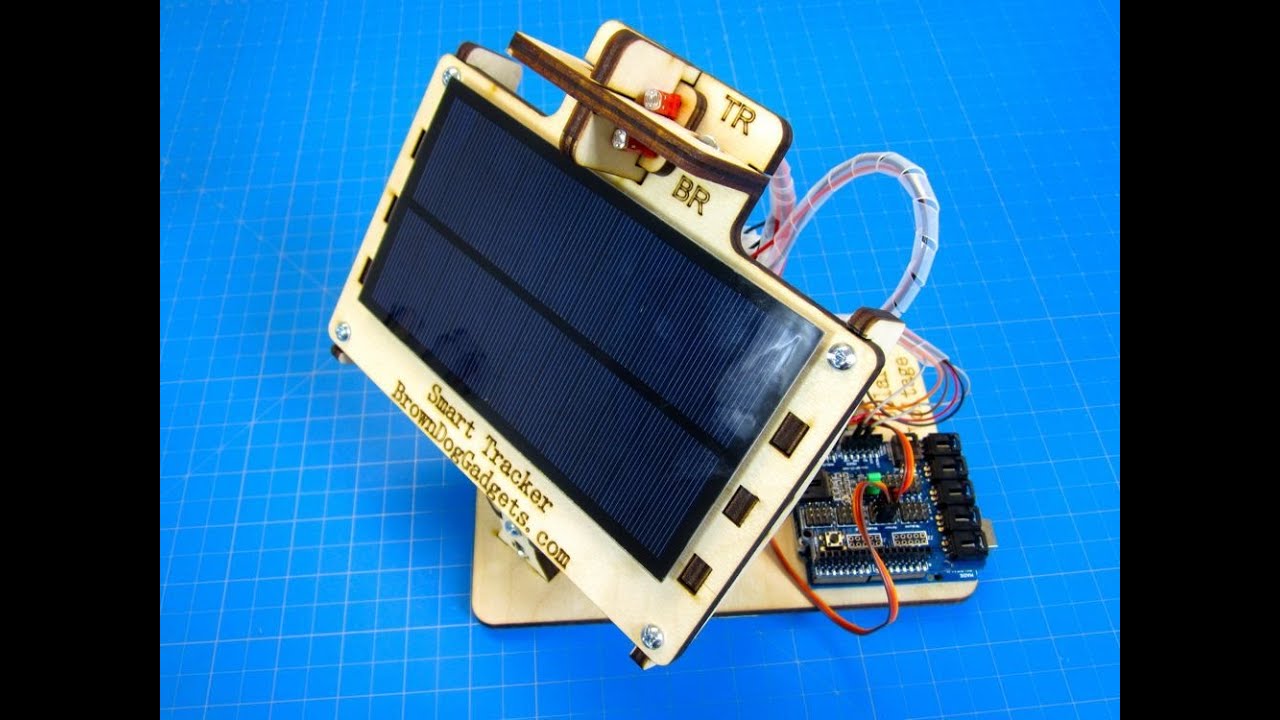
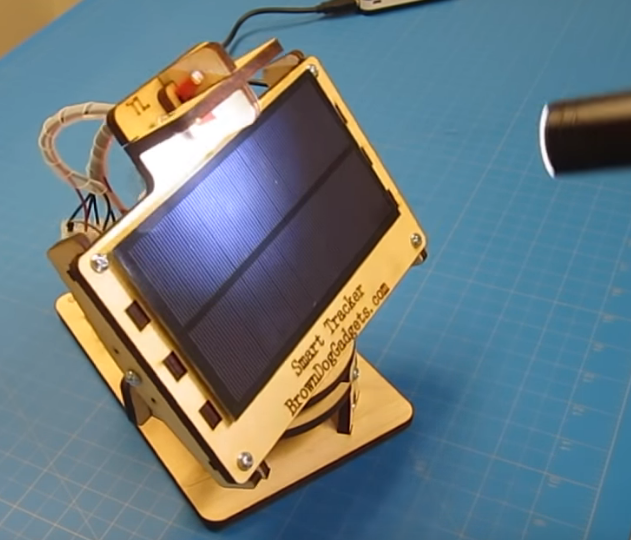
Dual Axis Solar Tracker V2.0 February 04, 2019 by Brown Dog Gadgets Fork Project Track the sun in X and Y with this simple Arduino Project Materials Project Hardware Due to the success of our original Solar Tracker project, youtube video, and the kits we were selling we received a wide range of feedback from a wide range of users.
Un trackeur solaire 2 Axes pour Arduino MCHobby Le Blog
solar project list list of ideas This project was created on 01/22/2022 and last updated 2 years ago. Details The goal of this project is to generate energy from sunlight. To accomplish so, we'll build a two-axis solar tracker system with several light sensors.
Arduino Single Axis Solar Tracker [arduinosolartracker] YouTube
The project was to create a little solar tracker, that follows a light. This device can be linked to a robot, a parabola, etc. Solar Tracker.. 1 // 29/07/2017 - Programme C - Tracker solaire - Carte Arduino ( UNO ) 2 // Ce programme a pour objectif de : 3 //.
[DIY] Single Axis Solar Tracker Using Arduino [part1] MiniArduino
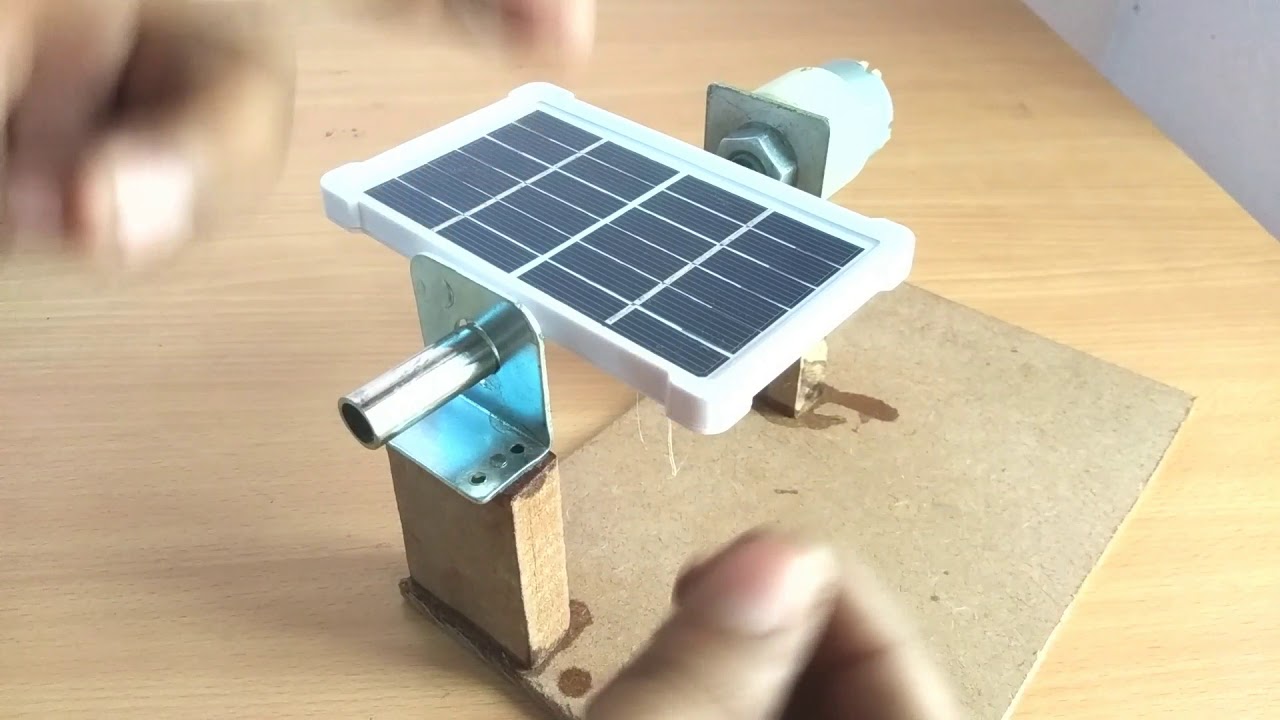
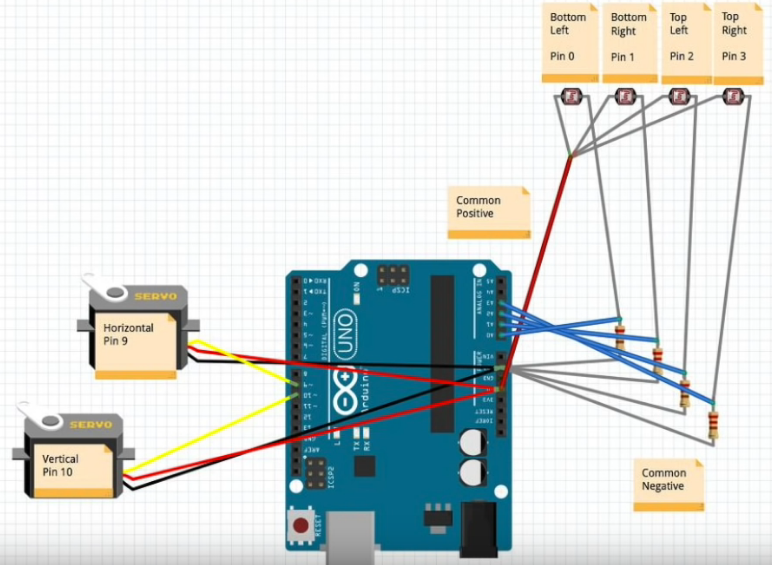
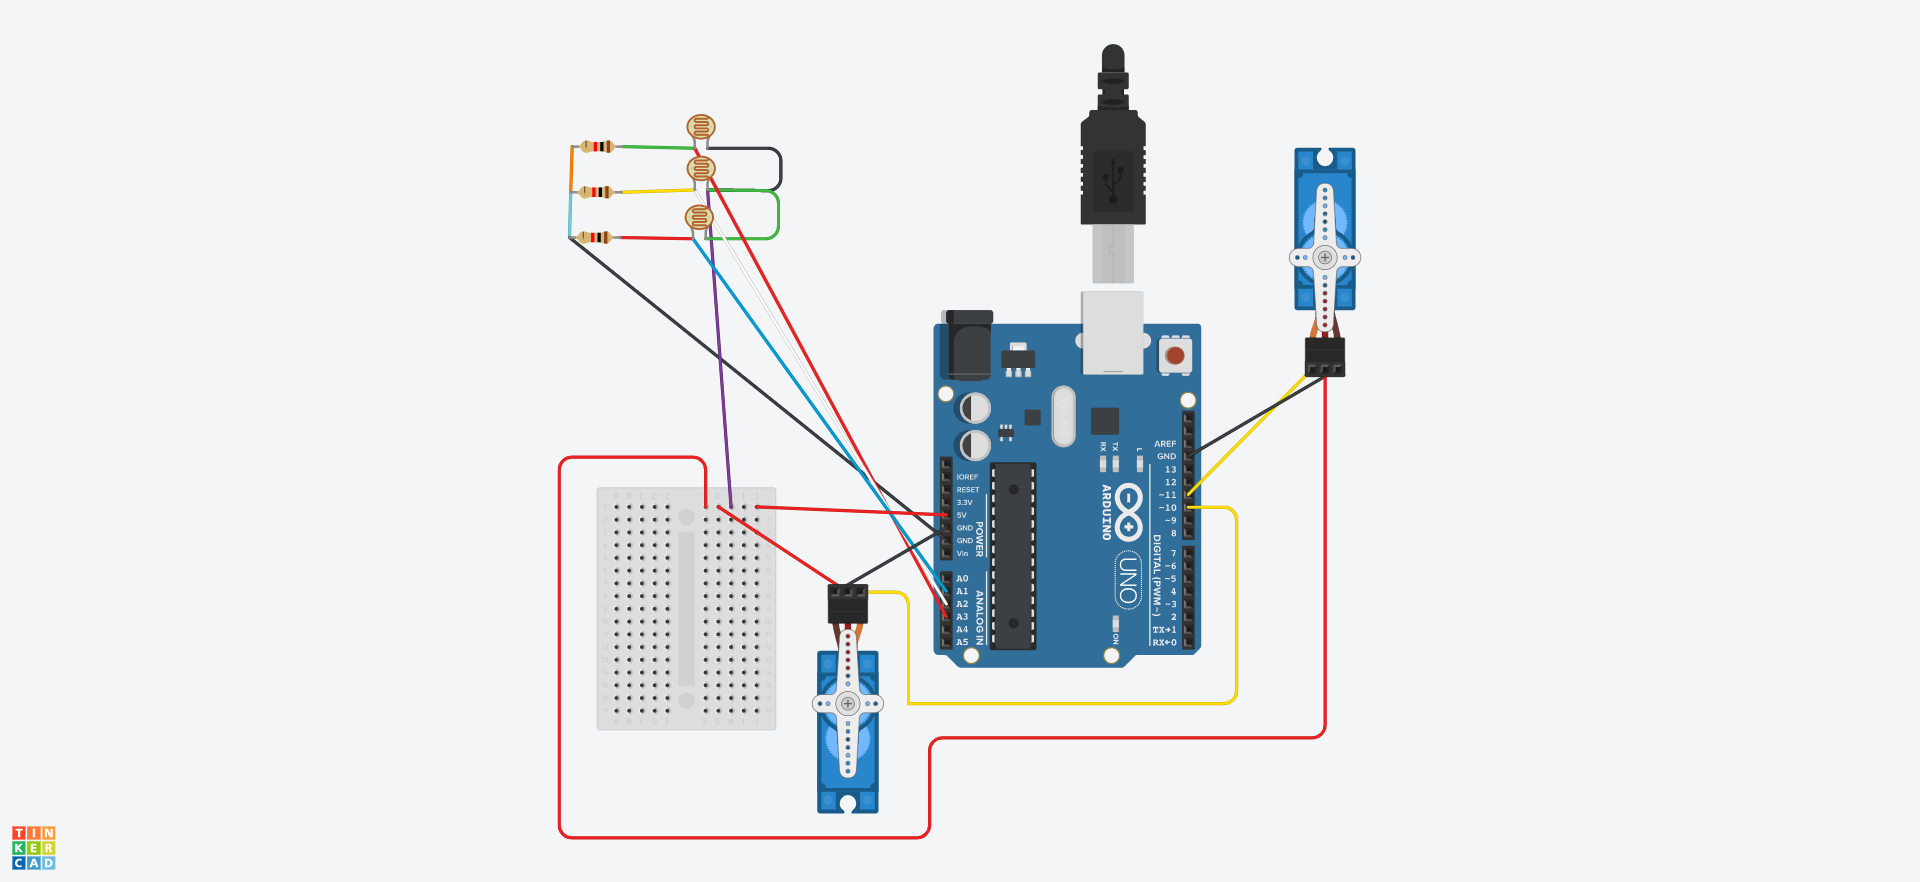
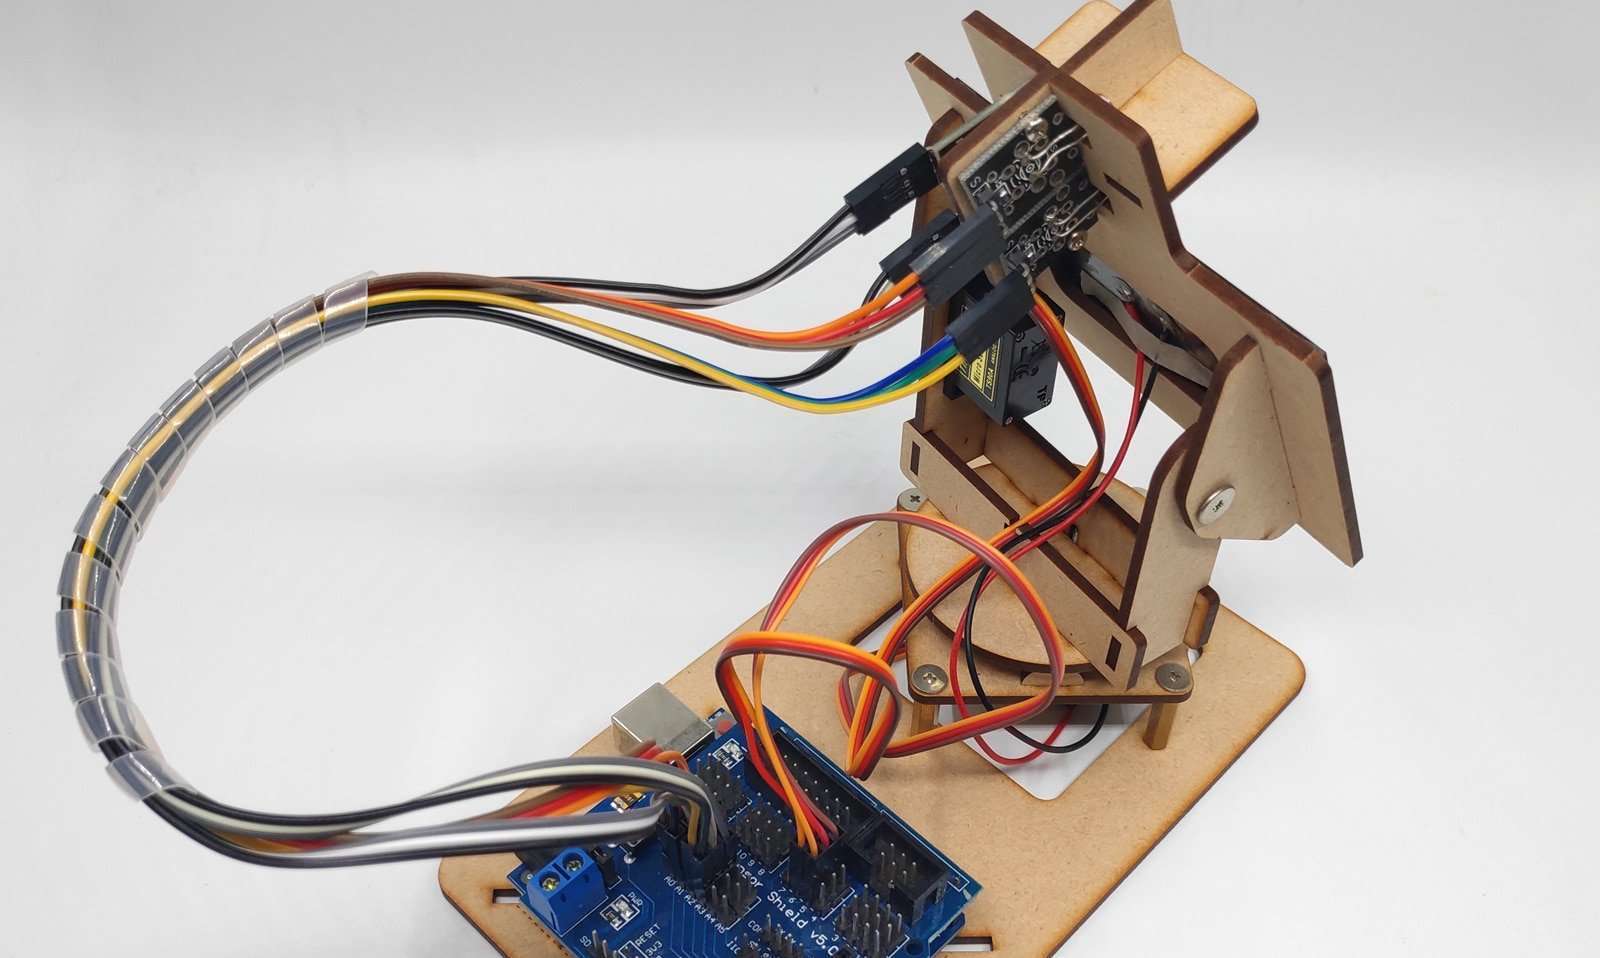
A solar tracker is a device which tracks the position of the sun and alters the position of the solar panel to maximize the power output of the system. Components required- 1) Jumper wires 2) Sheet metal (alternative: cardboard) 3) 2 Servo motors 4) 4 Light dependent resistors 5) Arduino + Arduino cable
Un trackeur solaire 2 Axes pour Arduino MCHobby Le Blog
© Automobile Association Developments Ltd. 2018 . uk breakdown; european breakdown; motorbike breakdown; report a breakdown; insurance; car insurance; home insurance.

DIY Solar Tracker Arduino Project ITA Hackster.io
Features: Servo, Sensor & Interfaces Servo: Servo is most widely used actuator in project like robotic arms, Rc plane, self balancer, multirotors, etc. · It uses a feedback mechanism to maintain its shaft position with minimum error. The servo motor has three wires unlike normal PMDC motors which have two wires.

Tracker solaire Arduino d’après la Latitude d’un lieu, la Date et l’heure du jour.
Source Code/Program. For designing Arduino Based Solar Tracker Using LDR & Servo Motor you need to program Atmega 328 Arduino microcontroller. Below is the program that will interface servo motor & LDR with Arduino for Solar Tracking. Copy this code and upload it to your Arduino Board. #include
Tutoriel DIY Tracker solaire
The solar panel tracker is designed to follow the sun movement so that maximum light intensity hits on the solar panel, thus increasing the power efficiency. Use of a solar tracker circuit in the field of energy production will increase its efficiency by almost 25%.

Building an Automatic Solar Tracker With Arduino Nano V2 17 Steps (with Pictures) Instructables
Hello and welcome back. In this project, we will learn how to make a simple DIY solar tracking system using Arduino. Also, it moves through the dual axis. I.

Building an Automatic Solar Tracker With Arduino UNO 8 Steps
Comment faire un tracker solaire avec Arduino et des photorésistances - YouTube Quand on débute dans un domaine, il est de bon ton de réaliser des petits projets pour s'entrainer et.

Pin on Farm tools
The solar tracking kit launched by KEYES is based on Arduino. It consists of 4 ambient light sensors, 2 DOF servos, a solar panel and so on, aiming at converting light energy into electronic energy and charging power devices. It boasts a smart phone charging module, a temperature and humidity sensor, a BH1750 light sensor, a buzzer, an LCD1602.

Solar Tracker V2.0 Solar tracker, Arduino projects, Arduino
The used servo motors are controlled by the Arduino UNO board via 3-wire electrical cable as shown in Fig. 3, two wires for supply and one wire for PWM to control its positions. The embedded software design. The embedded software is the piece that will be embedded in the hardware (Arduino Uno) to control and monitor the solar tracker test bench.

Tracker solaire Arduino d’après la Latitude d’un lieu, la Date et l’heure du jour.
Step 1: What You Will Need for a Solar Tracker Here is a list of the items which you need in order to complete this project. If you are looking to make a dual axis tracking stand then you will need to double up on the servos, LDRs and resistors. An Arduino (Uno used here) - Buy Here Single Axis Tracking Stand (Brief DIY Design Shown In Step 6)
Tracker Solaire Arduino par (oo) page 1 OpenClassrooms
Step 1: How Solar Trackers Work There are 3 main methods which are used to control a solar tracker. The first is a passive control system, and the other two are active control systems. The passively controlled solar tracker contains no sensors or actuators but changes its position based on heat from the Sun.
Arduino Intelligent Solar Tracking Equipment DIY STEM Programming Toys Parts SINONING
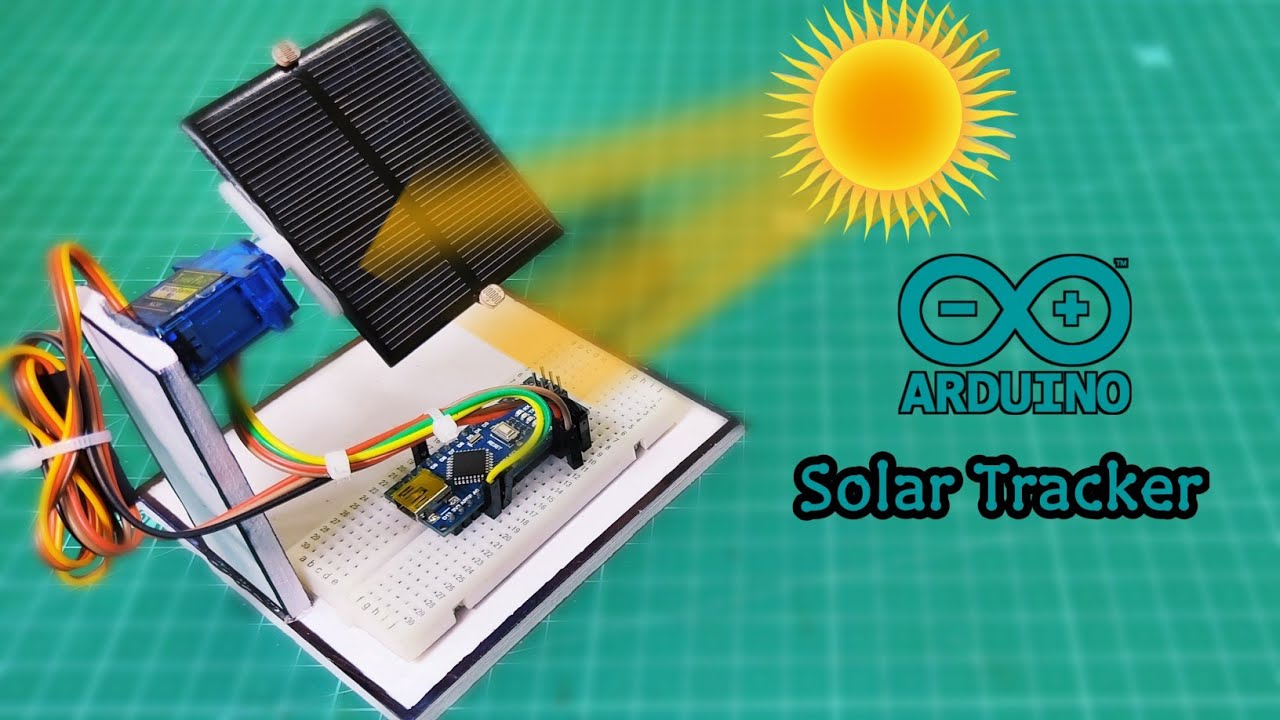
Ok, let's do this project step by step. The required components are given below. Arduino UNO board x 1 — Amazon / Our Store. Solar panel x 1 — Amazon / Banggood. SG90 servo motor x 1 — Amazon / Our Store. LDR sensor x 2 — Amazon / Our Store. 10k resistor x 2 — Amazon / Our Store. Jumper wires — Amazon / Our Store.